Creating snapshots
The Current Capture or a portion of it may be saved for later reference as a Snapshot. A Snapshot does not have to be displayed on the same diagram it was captured on. Selecting a previously saved Snapshot from the dropdown will show events for Data Objects that are part of the currently selected Diagram on the timeline. In a similar manor, selecting a different Diagram from the dropdown will show events from the currently selected Snapshot on the timeline provided the signals captured in the snapshot are part of the diagram being displayed.
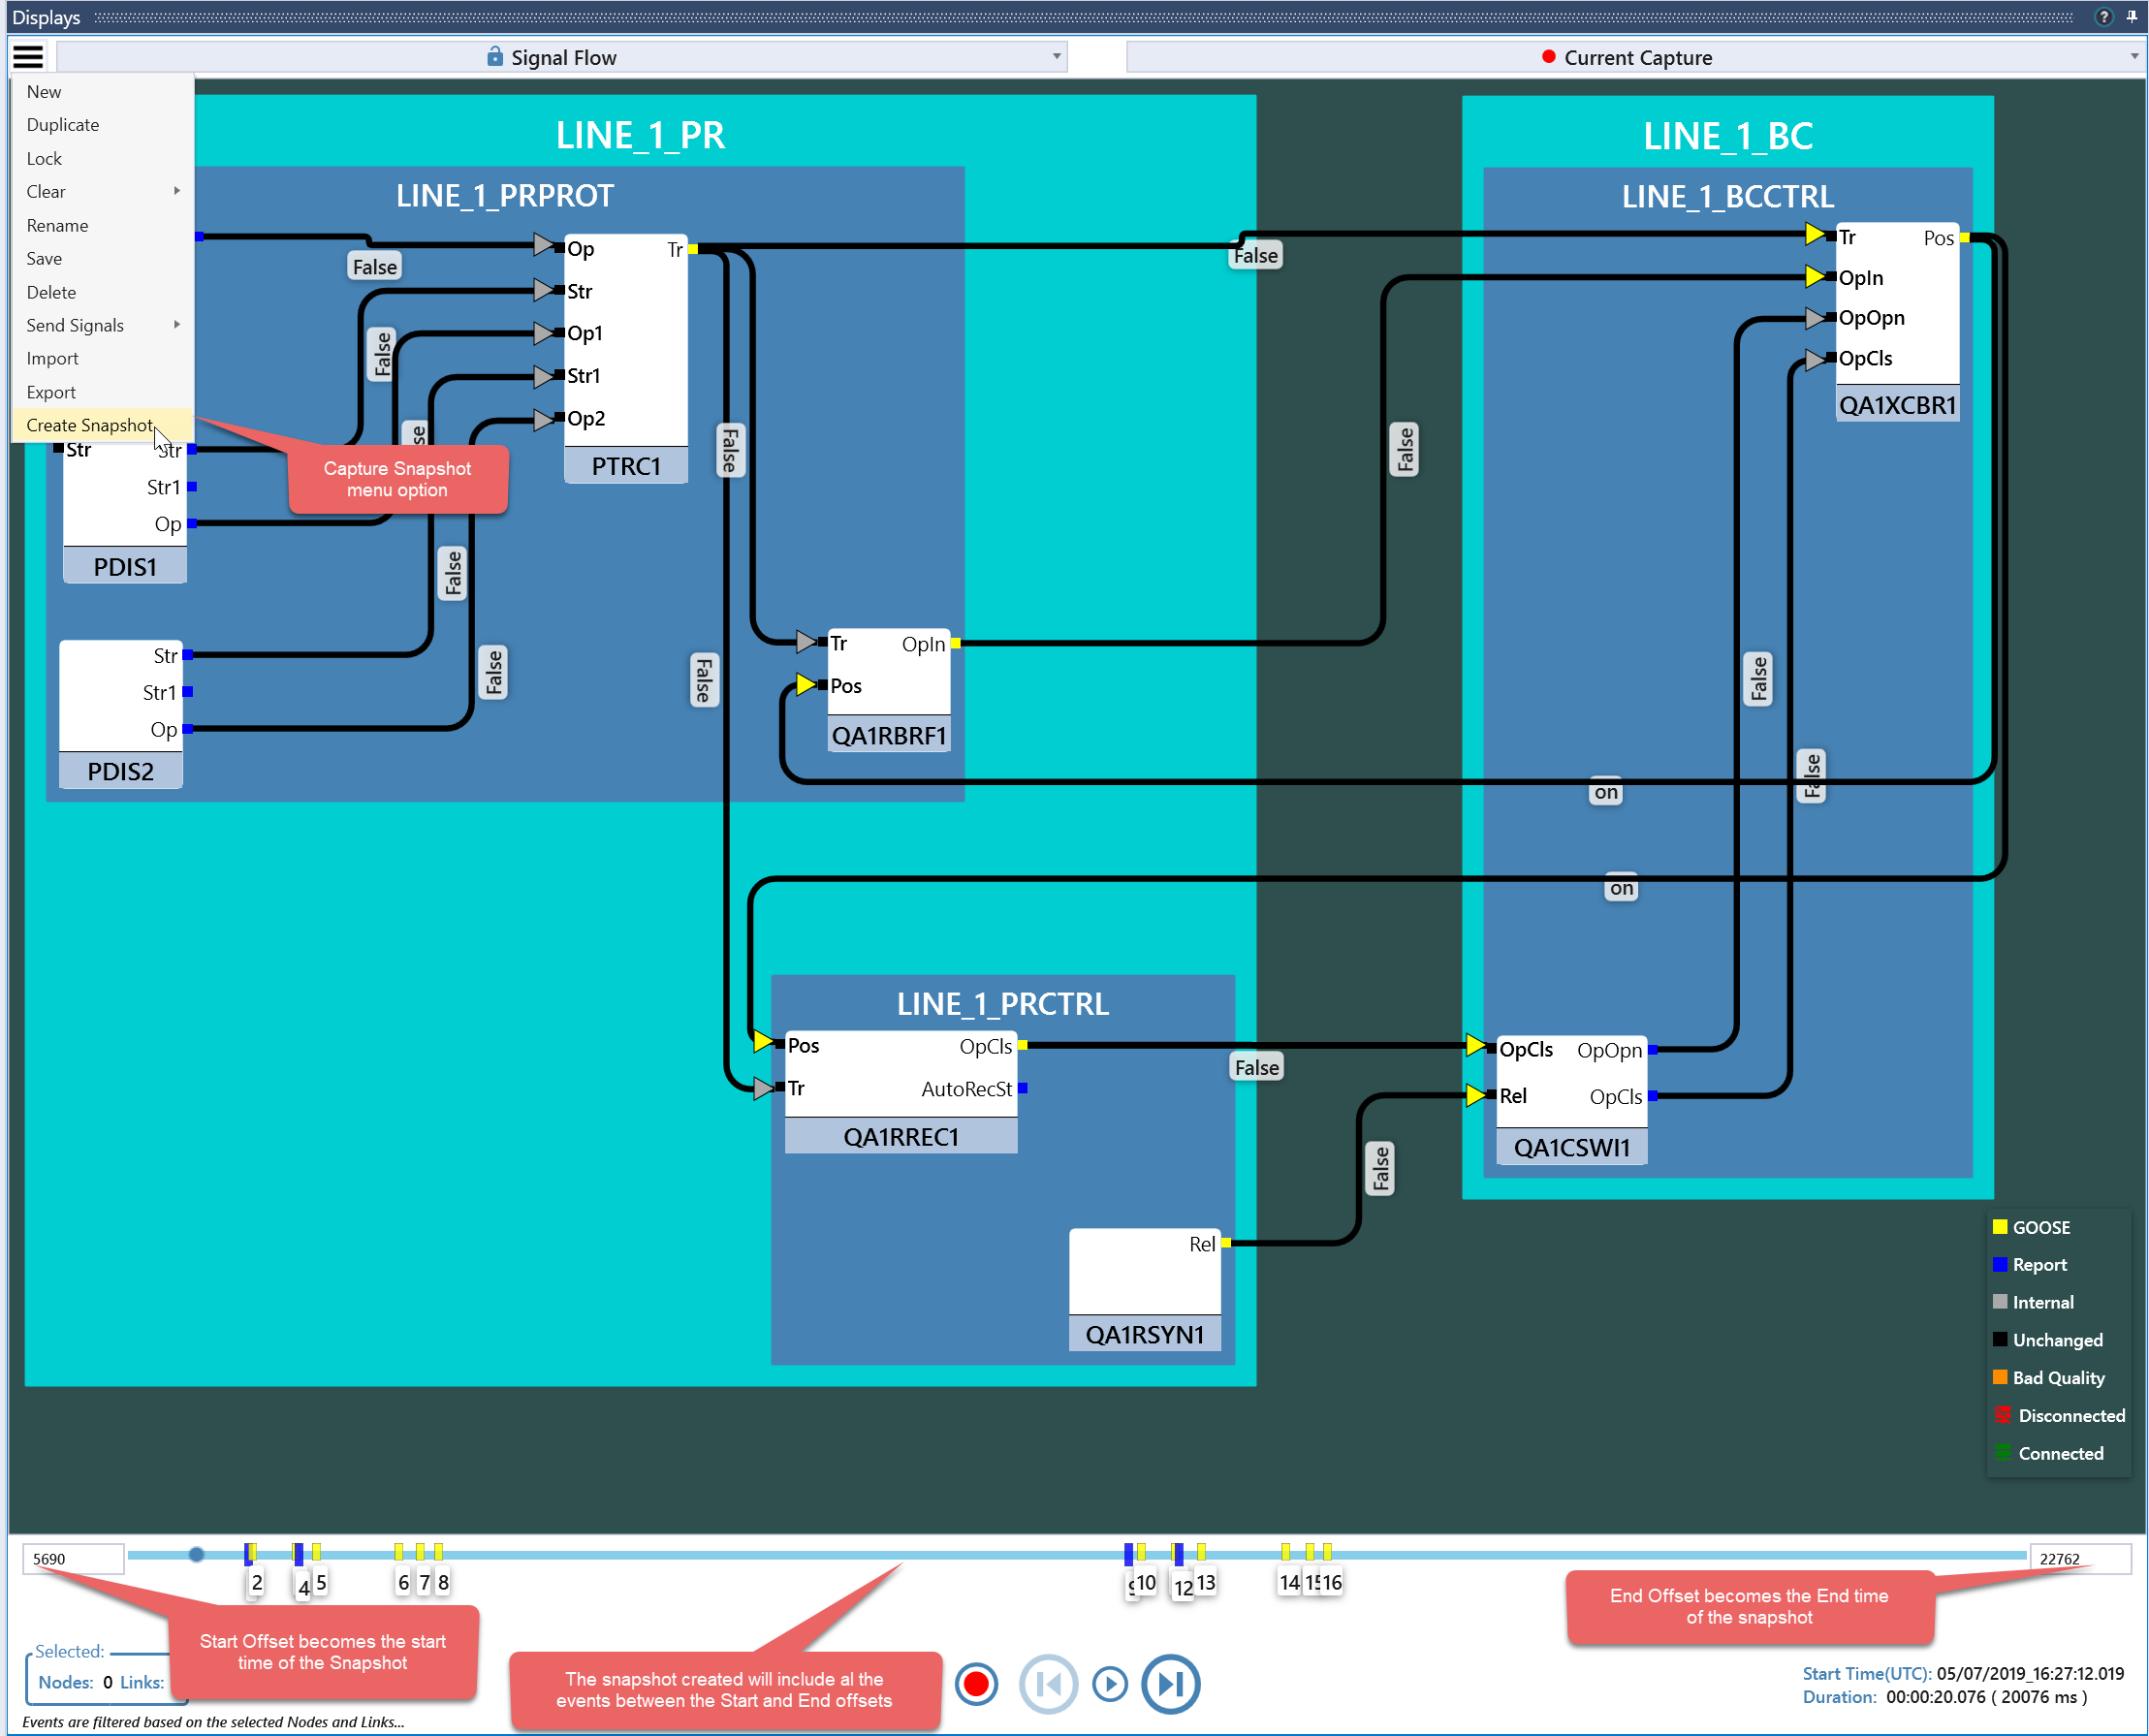
The following is a step by step process to capture a snapshot from the Current Capture or another previously saved snapshot:
- Select the Current Capture or a previously saved snapshot from the Snapshot Menu.
- Choose a ‘Start Time’ for the snapshot by entering an appropriate offset in the ‘Start Offset’ box (found at the left side of the timeline).
- Choose an ‘End Time’ for the snapshot by entering an appropriate offset in the ‘End Offset’ box (found at the right side of the timeline).
- Create the snapshot.
There are multiple ways to create a snapshot of a signal flow recording:
- Creating a snapshot from the menu option:
- From the context menu of the Play Back Controls Area: